Effective July 13, 2023 - The documentation on this page is made freely available under the Attribution 4.0 International (CC BY 4.0) License.
You are free to use and distribute the documentation as per the terms of the license.
Check out my other guides;
Build on Raspberry Pi 3 - Old Instruction Guide
Build a full Linux Vanilla Server
Build a full Linux Modded Server
Minecraft Server Version: PaperMC 1.17.1
Java Version: openjdk 16
Approximate time to complete: 30 to 45 minutes depending on your comfort level in Linux. Also the Optional Step 5 will add significant unattended time if you choose to pre generate the world for a performance increase.
Get free hosting credits towards a dedicated server with DigitalOcean by using this link.
Preamble
Step 1 - Install Java
Step 2 - Setup Your Environment
Step 3 - Install Minecraft
Step 4 - Configure your new PaperMC Minecraft Server
Step 5 - Optional - Pre-generating your world with Chunky
Step 6 - Optional - Configure Minecraft to start on bootup
Step 7 - Connect to Your Server
Step 8 - Hardening Your Minecraft Server if Visible on the Internet
Step 9 - Backup Your Server Frequently
Step 10 - Upgrading Your Minecraft Server
Step 11 - Recovering a Corrupted World
Step 12 - Creating Automatic Backups
Step 13 - Plugins and Datapacks
Donate Your donations keep this site ad free -- Thank You
Report errors in this guide. Your feedback is appreciated.
Since the early versions of Raspberry Pi people have been using them to try their hand at installing a Minecraft server. When the Pi2 shipped with 1GB of ram it finally became feasible to run a small Vanilla Minecraft world. It has never been a good choice for a highly performing server but has always had a place as a way of learning how it is done. It has been more than enough to meet the needs of a family who simply wanted to share a world together on their local network.
Minecraft has evolved into a much more "CPU hungry" game server and eventually became next to impossible, on the older Pi's, to have anything near acceptable. Now with the introduction of the Pi 4 8GB model, it is time again to consider the Raspberry Pi for Minecraft server version 1.17.1.
These instructions are for the Raspberry Pi4 8GB model with a 64bit OS. You could get away with the 4GB model, but the 8 is better. In these instructions we will start from the beginning, by installing java and PaperMC Minecraft version 1.17.1, the very latest.
I will show you how to optimize the world by pre-generating chunks in order to take the strain off the limited Raspberry Pi CPU. With these instructions you will learn how to install, configure and manage a Minecraft multi-player server.
For this install we need to use a 64bit version of Linux that will run on ARM. I use the RaspberryPi OS 64bit light version in this install, but you could also use Ubuntu 64bit for ARM or any version that will install on the Raspberry Pi4. The reason we need to use a 64 bit version is that older 32 bit versions will only use under 4GB of available ram. 64 bit allows you to use all of the ram on the 8GB Raspberry Pi4.
Raspberry Pi OS 64 bit light version (command line only)
If you prefer a full desktop version this download will provide that. Keep in mind, more CPU and RAM for your desktop environment means less for your Minecraft server.
Raspberry Pi OS 64 bit - Full Desktop Edition
The instructions assume that you have root (Administrator) access to your server. For simplicity I assume you are logging in as the root user. All of these commands will also work with sudo. If running sudo from your user account then make sure to add it when necessary. I will not be using sudo in front of these command line arguments throughout the document.
a) Login to your pi via ssh
via Linux: ssh pi@address of your pi
via Windows: Connect using a SSH client such as Putty
b) Download OpenJDK16 64bit for ARM.
Hint: From the terminal, use wget followed by the url above to download directly from within the terminal. Downloading to your desktop and copying it to your pi with Filezilla or WinSCP works too.
Next, copy your downloaded file to the /opt folder.
Finally go to the /opt folder and extract it with the following command;
tar -zxvf openjdk-16.0.2_linux-aarch64_bin.tar.gzc) The next step will be to setup the Java environment so that your system recognizes how to access the java binary.
sudo update-alternatives --install /usr/bin/java java /opt/jdk-16.0.2/bin/java 1
d) Set this version of java as your default version. This command will give you a list of versions to select, just select the right version option. If this is the only version on your pi then it will tell you so and select that one automatically.
sudo update-alternatives --config java
e) Finally, check your version to make sure you are using the right one
    java -version

You should see the following;

    openjdk version "16.0.2" 2021-07-20
    OpenJDK Runtime Environment (build 16.0.2+7-67)
    OpenJDK 64-Bit Server VM (build 16.0.2+7-67, mixed mode)
Optional - Removing Old Versions of Java
Old versions of java won't affect anything if you have plenty of disk space. To save a bit of space on your disk you can remove old versions that are no longer used. Simply remove the links to the binaries with update-alternatives and delete the java folder. To remove version 1.8.0_121 for example;
f) remove the link
sudo update-alternatives --remove "java" "/opt/jdk1.8.0_121/bin/java"
g) remove the folder (be careful whenever using rm -r -f, a misplaced "/" or "*" could/will mess up your system)
    cd /opt
    sudo rm -r -f jdk1.8.0_121
apt update && apt -y upgrade
b) Install screen (This will be needed to run your minecraft server console while logged out of your Linux server).
apt install screen
a) create the folder
    cd /opt
    mkdir minecraft
    cd minecraft
b) download the latest jar file from PaperMC's website. There is a new version released every day, download it as follows but pick the latest one.
    wget https://papermc.io/api/v2/projects/paper/versions/1.17.1/builds/188/downloads/paper-1.17.1-188.jar

    rename the file server.jar;

    mv paper-1.17.1-188.jar server.jar
Get into the habit of renaming the download server.jar, as this will save you from editing your startup scripts when bringing up the server.
    cd /opt/minecraft
    java -Xms128M -Xmx6500M -jar /opt/minecraft/server.jar nogui
*Note 1: I am using standard java startup parameters. For further optimization consider using the Aikar Flags instead.
For simplicity in this documentation I use the shorter command above, but here is my full Aikar flag setup that provides further optimizations. If you use this longer command just subsitute it wherever I put the shorter command above.
java -Xms128M -Xmx6500M -XX:+UseG1GC -XX:+ParallelRefProcEnabled -XX:MaxGCPauseMillis=200 -XX:+UnlockExperimentalVMOptions -XX:+DisableExplicitGC -XX:+AlwaysPreTouch -XX:G1NewSizePercent=30 -XX:G1MaxNewSizePercent=40 -XX:G1HeapRegionSize=8M -XX:G1ReservePercent=20 -XX:G1HeapWastePercent=5 -XX:G1MixedGCCountTarget=4 -XX:InitiatingHeapOccupancyPercent=15 -XX:G1MixedGCLiveThresholdPercent=90 -XX:G1RSetUpdatingPauseTimePercent=5 -XX:SurvivorRatio=32 -XX:+PerfDisableSharedMem -XX:MaxTenuringThreshold=1 -Dusing.aikars.flags=https://mcflags.emc.gs -Daikars.new.flags=true -jar /opt/minecraft/server.jar nogui*Note 2: -Xms128M and -Xmx6500M are parameters telling java to start with 128MB of ram as a minimum for the jar file and let it grow to 6500MB max as needed. These are not constructs unique to Minecraft. Do a google search on (xms xmx jvm) and you will get some good information on how to manage a JVM's heap. From there you can make a better determination on what you should set this to for your servers resources and how you will be using your server.
b) accept the EULA. The first time you try to run your minecraft server you will be required to accept the EULA.
nano eula.txt
c) Change the following line to true and save the file
eula=true
d) Run the server a second time to generate your world. World generation will take a while the first time. Subsequent server starts
will be much quicker.
    nano server.properties

    change the following line with your preferred seed directly after the = sign
    level-seed=

    If you leave it blank Minecraft will generate a random world on first launch
On a low power system you can lower the view distance. Start with 10
and adjust it downward if you get some lag. If you have plenty of CPU and RAM you can increase it as well.
java -Xms128M -Xmx6500M -jar /opt/minecraft/server.jar nogui
e) make things a little easier on yourself by using a script to start minecraft
    cd /opt && mkdir scripts
    cd scripts
    nano minecraft.sh
f) Copy and paste the following in your minecraft.sh file
    #!/bin/bash
    cd /opt/minecraft/ && java -Xms128M -Xmx6500M -jar /opt/minecraft/server.jar nogui
g) Save the file and make it executable
chmod +x minecraft.sh
h) Start your server
    screen <---hit enter at the informational message
    /opt/scripts/minecraft.sh

    To exit the screen session hit 'CTRL AD'
You can improve this by pregenerating a chunk radius around your spawn point. Chunky is a plugin that does just that, it pregenerates chunks before you enter the world the first time. The process is quite simple, but time consuming. On a Raspberry Pi4 it can take up to 10 hours to pregenerate a 5000 block radius, so this is something you will want to start and forget about while it does its thing. Alternatively you can generate your world on your computer if you have a faster CPU. I was able to cut 8 hours off the process by using a laptop with a faster Intel CPU.
On a final note, this will increase the disk space required from the outset of your world. Pregenerating a 5000 block radius creates an approximately 2GB world folder whereas not pregenerating would start with a world in the 200-300Mb range, which would grow over time as you explore.
    chunky spawn   <---sets the center of the world at the spawnpoint
    chunky radius 5000 <--- sets 5000 block radius from spawn
    chunky start <--- pregenerates the 5000 chunk radius
You can cut off significant time and disk space usage by pregenerating a smaller area. Simply specify a radius of 1000 blocks for example.
nano /etc/rc.local
Right before the last line 'exit 0' add the following command, save and exit the file. This will allow the minecraft server to start in a
detached screen session when the server boots up.
screen -dm -S minecraft /opt/scripts/minecraft.sh
b) To access your console after bootup use the following command;
    sudo screen -r minecraft

    To exit the screen session use the following command
    CTRL AD
Note: Some people may question why I am using rc.local instead of an init script to start the minecraft server. I don't want to run the server in the background, I want a full screen session accessible to view and interact with the minecraft server console. If I want to stop the server I want to issue a stop command there, not from a script in init.d. Also rc.local is one line and is super easy. It just works well for this situation. I use init scripts for other things and they are great, but this is just a preference I have for a minecraft server. Do what works for you.
b) Click the Add Server button
c) Edit the Server Info as follows (insert the IP address of your Linux server)
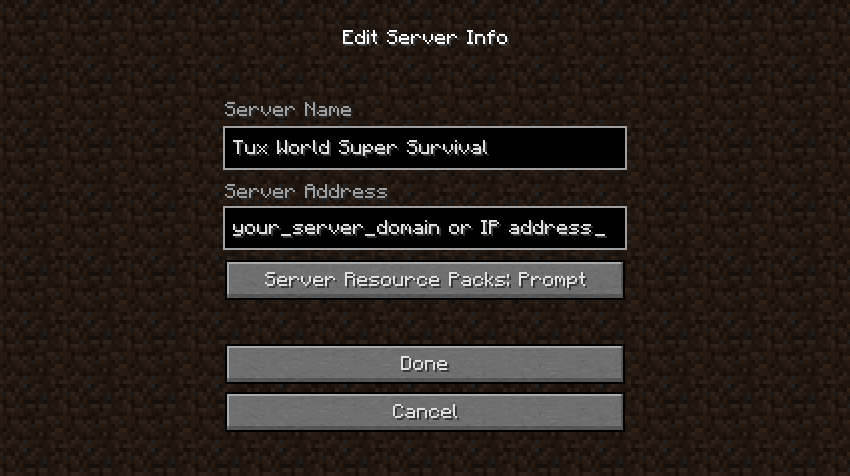
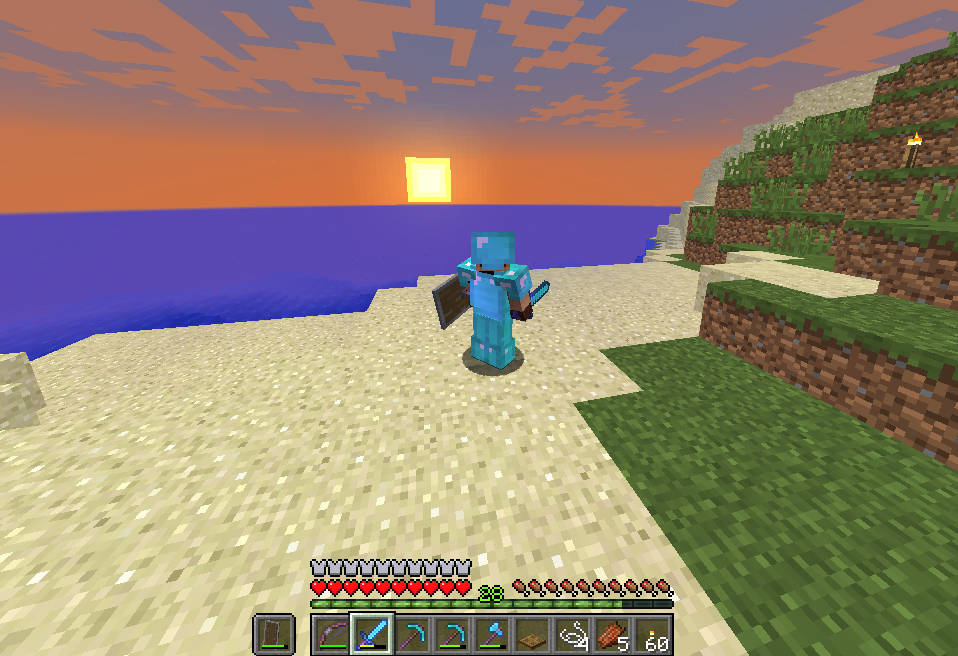
d) Enter your world for the first time and have fun!!!
a) Activate whitelisting. It is extremely important to activate whitelisting if your server is visible on the internet. Port 25565
is a popular port and is actively scanned by all kinds of people using automated scripts.
They are looking for open servers so they can login and cause havoc on your world. Whitelisting will stop
unauthorized users from joining your world.
In your server.properties set the following value to true;
    white-list=true

Restart your minecraft server and run the following command at the console for each user you would like to allow.

    whitelist add minecraft_user1
    whitelist add minecraft_user2

To remove a user

    whitelist remove minecraft_user2
When an unauthorized user tries to connect to your server they will simply get a message that they are not
whitelisted and will be turned away.
    login to your server
    cd /opt
    tar -zcvf minecraft_backup.tar.gz minecraft
Copy the minecraft_backup.tar.gz to a safe location, preferably another computer. This file can be used to restore your world if needed. Get into the habit of doing this regularly. You can even use the cron scheduler to automate the process at a specified time each day as explained in Step 12.
You've done it. You have successfully built your Minecraft Server. PaperMC releases new versions all the time to fix bugs. No problem, upgrading your server to the latest version couldn't be easier.
a) download the latest PaperMC file like you did in Step 3
    cd /opt/minecraft
    wget https://papermc.io/api/v2/projects/paper/versions/1.17.1/builds/189/downloads/paper-1.17.1-189.jar (or whatever the latest version is)
Now delete the old server.jar and rename the new file.
    rm server.jar
    mv paper-1.17.1-189.jar server.jar
b) Restart your server by either running your startup script or reboot your Linux server if you configured it to start on boot.
If you did your backups like we discussed in Step 9 then you are laughing. To restore your previous backup do the following;
Delete your existing minecraft folder

    cd /opt
    rm -r -f minecraft

copy your previously saved minecraft.tar.gz file to your /opt folder.

restore your world

    tar -zxvf minecraft.tar.gz
That's it, restart your server and you have successfully restored from your last good backup.
Any changes you made since that backup are gone, so it is important to do your backups regularly.
1) Provide a ready to use script to initiate the backup
2) Configure the cron scheduler to start the backup at 2:02am everyday
3) Name the backup day_of_week-minecraft-.tar.gz
This will create a 7 day rotation of backups with the oldest being overwritten with a new one.
NOTE: The DriveBackupV2 plugin is another solid option, especially if you are using a Minecraft hosting provider and don't have access to the command line. This is mentioned in Step13 later on.
a) Create your script.
    cd /opt/scripts
    nano mcbackup.sh
b) copy and paste this script into your mcbackup.sh file you have open in the
nano editor. Change the dest= line to point to the folder you want your backups to reside in.
#!/bin/sh
####################################
#
# Backup minecraft world to a
# specified folder.
#
####################################

# What to backup.  Name of minecraft folder in /opt
backup_files="minecraft"

# Specify which directory to backup to.
# Make sure you have enough space to hold 7 days of backups. This
# can be on the server itself, to an external hard drive or mounted network share.
# Warning: minecraft worlds can get fairly large so choose your backup destination accordingly.
dest="/home/username/minecraftbackups"

# Create backup archive filename.
day=$(date +%A)
archive_file="$day-$backup_files-.tar.gz"

# Backup the files using tar.
cd /opt && tar zcvf $dest/$archive_file $backup_files
c) Save the file by pressing CTRL-X and entering Y
d) Make the file executable
chmod +x mcbackup.sh
e) Test your script. Before creating the scheduled task ensure your script
worksminecraft/index.html
/opt/scripts/mcbackup.sh
You should see the backup happening. Once completed open the file it created
which should be in the location that you specified. Once you have confirmed
that your backup works, create a scheduled task to automate the backups.
f) Create a scheduled task with the cron scheduler
Make sure you are logged in as root so that it writes to your root user crontab.
crontab -e
Enter this line at the end of your root crontab and then save it.
02 2 * * * /opt/scripts/mcbackup.sh &> /dev/null
This will create your backup every day at 2:02 am. That's it, in your folder
where you specified your backups to be created you will have the following
after one week;
Monday-mcbackup-.tar.gz
Tuesday-mcbackup-.tar.gz
Wednesday-mcbackup-.tar.gz
Thursday-mcbackup-.tar.gz
Friday-mcbackup-.tar.gz
Saturday-mcbackup-.tar.gz
Sunday-mcbackup-.tar.gz
Every day your oldest file will be replaced with the new backup giving you a seven day rotation of backups.
Plugins are usually files that end with the .jar extension and can be uploaded to your plugins folder, like we did earlier with Chunky. After uploading a plugin, restart the server which will start the plugin. Often (but not always) the plugin will create a folder called plugins/plugin_name where you will find a file called config.yml. This is where you can configure the plugin as desired.
Datapacks are like plugins but are inserted, usually as .zip files in the world/datapacks folder. Same idea as plugins, simply restart the server after installing the datapack.
Keep in mind that the more plugins and datapacks you install, the more resources your server will use or the more conflicts can happen. If you start seeing strange things happening on your server you may have a plugin causing you some grief. Remove plugins one by one to find the offending one. I personally like to go light on plugins and datapacks but I have ones that I deem either essential or that just make the game better.
You can download plugins directly from Bukkit. Just make sure they are compatible with your version of Minecraft.
Some of my favorite datapacks are available from Vanilla Tweaks.
Datapacks
That's it! Now have fun! I hope these instructions were helpful and that you learned a bit of how a Minecraft server functions.
PayPal